In the world of custom packaging, first impressions matter. A lot. And sometimes, it’s not the colors or the design that people notice first, it’s the texture.
That’s where embossing and debossing come in.
These two techniques are often seen on premium packaging. They add a tactile element that makes the packaging feel more refined, more intentional. But beyond just looking good, embossing and debossing play a strategic role in branding.
What is the Key Difference Between Embossing and Debossing?
At first glance, embossing and debossing might seem like two sides of the same coin and in many ways, they are. Both involve pressing a design into a surface to create texture. Both are used to add a visual element to packaging.
But the impact they create? Slightly different.
Embossing
Embossing is all about creating depth (quite literally). It’s the process of raising a design or text off the surface of your packaging to give it a subtle, 3D lift.
This raised effect is achieved using two metal dies: one with the design pushed out (male die) and another that fits it perfectly (female die). These dies press together on either side of the paper or card stock, sculpting the chosen area into a raised impression.
Embossing works especially well when you want to highlight something important.
But there’s a catch worth keeping in mind: embossing doesn’t just affect the front of your packaging. It also makes an impression on the back. Literally.
That’s not necessarily a drawback—it’s just something to be intentional about. You can use it to your advantage by integrating the reverse impression into the overall design. In fact, some brands get creative with both sides to add an unexpected visual twist.
For best results, use thicker paper or card stock. A detailed die paired with a strong base material will give you a clean, crisp finish that looks and feels premium.
How the Process Works:
- Creating the dies: A custom design is etched into a pair of metal plates.
- Heating and positioning: The dies are mounted into a press and heated to soften the material slightly.
- Pressing: The packaging material is pressed between the dies, sculpting the design into a raised form.
- Finishing: Once released, you’re left with a design that stands out—visually and physically.
Types of Embossing
Depending on the finish you want and how you want your brand to come across, there are different ways to apply the embossing technique. Here are the most common types of embossing used in custom packaging:
- Blind Embossing
This is the most minimal form of embossing, and sometimes, that’s exactly what makes it effective. Blind embossing doesn’t use any ink, foil, or color. It relies purely on depth and shadows to make the design stand out. - Foil Embossing
Foil embossing takes things up a notch by combining raised texture with visual flair. A layer of metallic or colored foil is pressed into the material at the same time the embossing is applied. - Registered Embossing
This technique is all about alignment. Registered embossing lines up the raised design with printed elements on the surface, so the embossing following the exact shape or text that’s been printed. It gives the final product a layered, multi-dimensional feel. This is a great option when you want your visuals and texture to work together rather than independently.
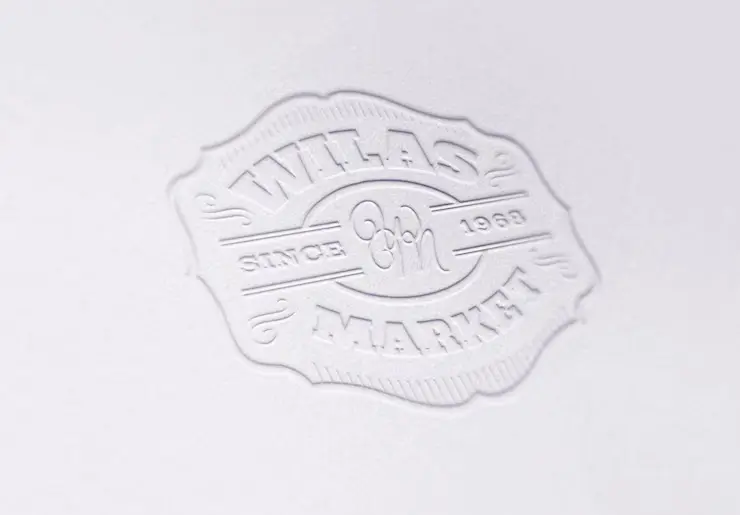
Debossing
While embossing raises your design above the surface, debossing presses it down into the material, creating an indented, sunken effect.
This technique uses a single metal die, which is pressed into the front side of the packaging material. And unlike embossing, debossing leaves the reverse side of your packaging untouched.
Debossing brings a subtle kind of sophistication. It’s less about shine and more about depth. And like embossing, you can keep it simple with blind debossing (no ink or foil), or pair it with foil stamping or ink fill to make the recessed area stand out visually.
This technique works especially well for designs where minimalism is the goal. You get texture and emphasis without overwhelming the overall look.
How the Process Works:
- Die Creation: A metal die is crafted with the design you want to press into the material.
- Press Setup: The die is fitted into a heated press to allow for smooth indentation.
- Material Placement: The card stock or packaging material is positioned and pressed.
- Finishing Touch: The material is removed, now carrying a clean, precise indentation.
Where Embossing/Debossing Are Typically Used?
These techniques are often used to elevate how a product feels in someone’s hands, and that sensory detail goes a long way in influencing perception. Premium. Thoughtful. Memorable.
You’ll find embossing and debossing in places where presentation matters.
Some common use cases include:
- Product packaging: Especially in cosmetics, gourmet food, or high-end goods. Embossing adds that “premium” feel customers associate with quality.
- Business cards: A debossed logo or embossed name adds weight—literally and figuratively, to your brand.
- Wedding and event invitations: These techniques help set the tone before the envelope is even opened.
- Books and journals: Embossed titles or covers give a tactile experience to the reader, especially in collector’s editions.
- CDs and album covers: Artists use these techniques to give their branding a more established, curated look.
- Leather goods: Think custom logos pressed into wallets, tags, or notebooks.
- Letterheads, envelopes, greeting cards: Small touches, but ones that leave a lasting impression.
Materials Suitable for Embossing and Debossing
Here are some of the most common materials that respond well to embossing and debossing:
- Paper
Used extensively in business cards, letterheads, and custom packaging. Lighter paper stocks can be embossed or debossed, but for cleaner results, it’s often better to use heavier grades. - Cardstock
Thicker and sturdier than regular paper, cardstock is ideal for high-impact applications like premium packaging, invitation cards, or branded inserts. Its structure holds the design well and gives a richer, more defined texture. - Leather
Popular in fashion and accessories, like wallets, belts, journal covers, and tags. Debossed leather logos or initials have become a mark of craftsmanship and quality. - Vinyl
Often used in wall decor, signage, and even packaging labels. Vinyl can be debossed or embossed to add a textured finish, especially in interior branding or retail display settings. - Fabric
In the textile industry, embossing techniques help create patterns and textures that give garments or home furnishings a unique visual and tactile element. - Food
Yes, even food. Chocolates, cookies, and baked goods are sometimes embossed or debossed with logos or seasonal patterns. It’s more common in luxury or artisan food packaging, where branding is carried through to the product itself.
Important Considerations When Choosing Between Embossing and Debossing
Here are some key factors to think about before you choose one over the other:
- Keep the Artwork Simple
Clean, minimal designs translate best in embossing or debossing. Complex shading or detailed graphics might look great on screen, but once they’re pressed into a surface, they can lose clarity. Stick to simple logos, initials, patterns, or icons for the best results. - Use Vector Files
Always use vector art for your design. Unlike raster images, vector files don’t lose quality when resized. They ensure your die is sharp, clean, and scalable, which leads to a much crisper finish, especially important for small details or fine lines. - Choose the Right Design Element
Not everything needs to be embossed. In most cases, embossing or debossing works best as an accent, something that draws the eye and creates a focal point. Text, logos, or a single image element are usually ideal. Avoid trying to emboss large areas unless you’re going for a repetitive background pattern. - Paper Weight Matters
The thicker the stock, the better the result. Lightweight paper can’t handle the pressure needed to create a strong impression and in worst cases, it might tear or warp. Heavier cardstock or specialty materials are a safer bet for durability and a premium finish. - Depth and Scale Should Align
Planning a multi-level emboss or deboss? The deepest parts of your design should also be the broadest. If you try to press deep into a small or narrow area, it increases the risk of tearing the material or losing detail. Keep deep impressions reserved for larger shapes or bolder elements. - Think About the Reverse Side
Embossing affects both sides of your material. While the front gets the raised design, the back will carry an indent. This isn’t necessarily a downside but it’s something to plan for. You might want to keep the back blank, or use the indentation as part of your overall design. On the other hand, debossing leaves the reverse untouched, which gives you more freedom with two-sided print pieces. - Budget and Scale
Both embossing and debossing require custom dies, which adds to production costs. For small batches or one-off prints, that might not be worth the investment. But for high-impact packaging or branded materials meant to impress, it’s an expense that often pays for itself.
In a Nutshell
Embossing lifts your design up; debossing presses it down. Both add a tactile, high-end finish to packaging and print materials. The right choice depends on your design, material, and the impression you want to create,
FAQs
What is the difference between embossing and stamping?
Embossing creates a raised design or texture on the material, giving it a 3D effect, while stamping usually refers to pressing ink or foil onto a surface to create a flat image or design.
What is the difference between bevel and emboss?
Beveling creates an angled edge to a design, making it appear raised or recessed at an angle, while embossing adds depth by raising or pressing a design into the material, creating a more defined, 3D effect.
What is the difference between debossed vs engraved?
Debossing presses a design into the material, creating a recessed (indented) effect, while engraving removes material to carve a design into the surface, leaving a detailed, etched impression.

Jennifer James
My specialty is developing cost-effective, attractive, and appropriate packaging for protecting products. I am working with the company to design custom packaging that meets the client’s requirements.
One Response