If you’ve ever unboxed a product and admired its sleek, well-structured packaging, you’ve witnessed the power of a precise dieline.
But what exactly is a dieline in printing and packaging?
Think of a dieline as the blueprint of a package. It’s a technical design file that guides printers and manufacturers on where to cut, fold, and crease a package. Without a dieline, packaging would be chaotic: misaligned edges, poor folding, and a final product that looks unprofessional.
In this blog, we’ll break down everything you need to know about dielines: why they matter, how they’re created, and the role they play in the printing and packaging process.
What Does a Dieline Mean In Packaging and Printing Industry?
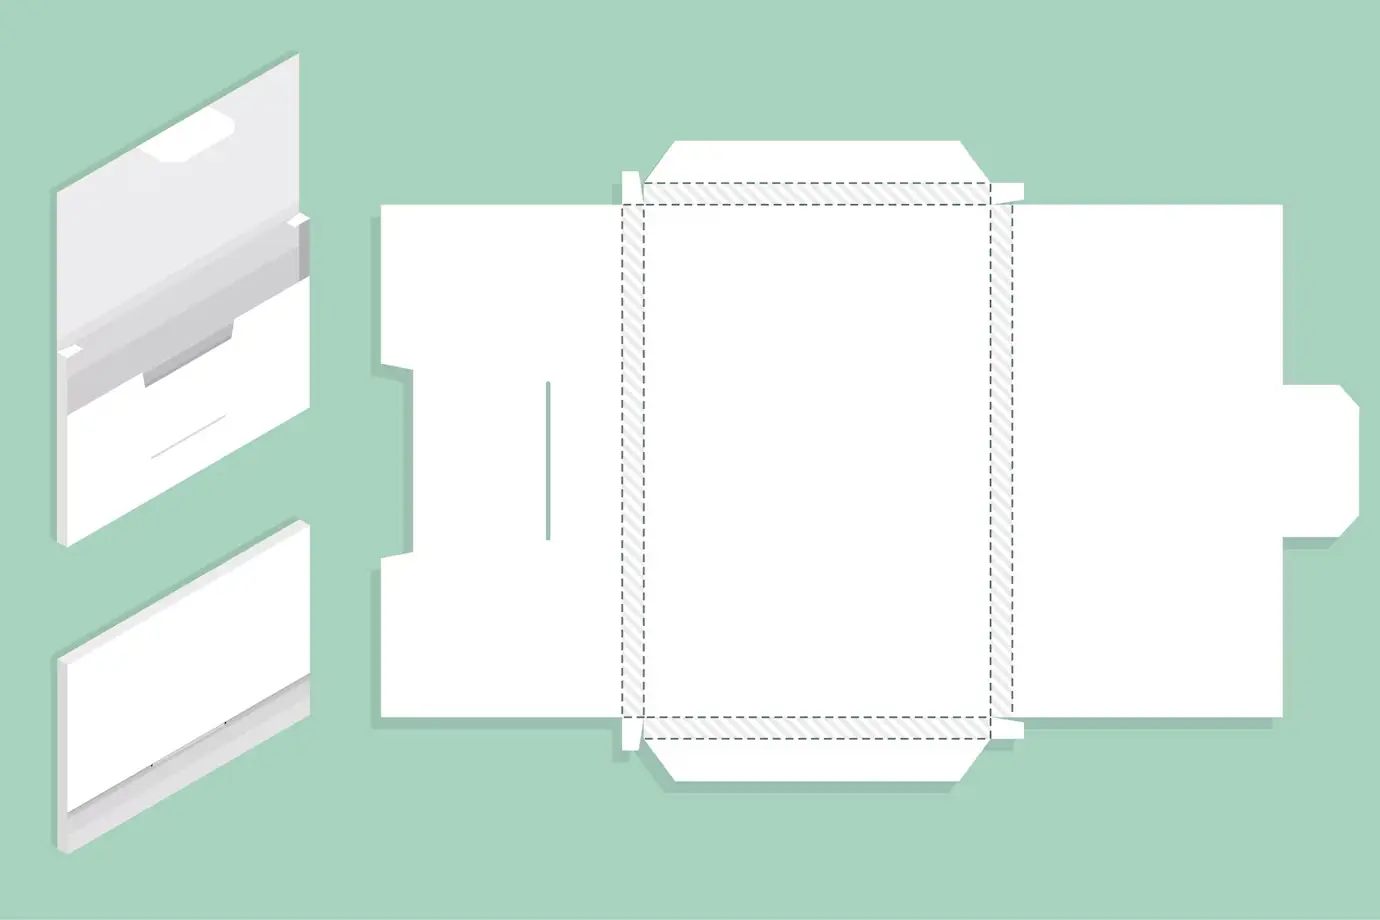
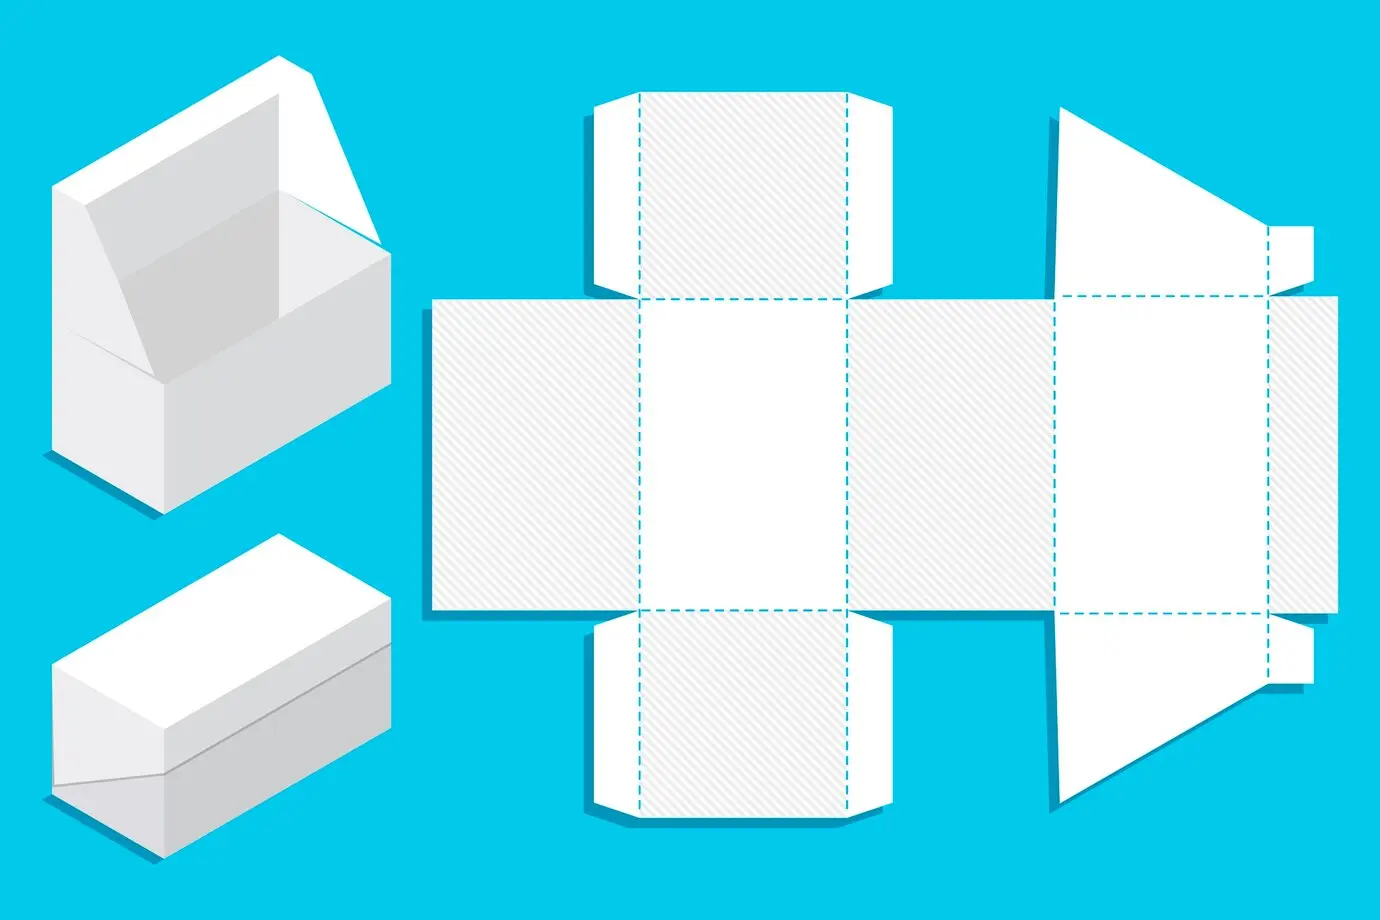
In the packaging and printing world, a dieline is the structural foundation of any package. It’s a precise, technical template that shows where a package should be cut, folded, and creased.
Dielines aren’t exclusive to boxes, they’re also used for envelopes, pocket folders, labels, and other printed products that require precise cutting and folding. Essentially, a dieline ensures that the final product is properly aligned and structurally sound before mass production begins.
The process of creating a dieline starts with understanding the product dimensions. If a client provides an existing package as a reference, it’s common practice to carefully disassemble it, take measurements, and analyze how the folds and tucks come together. If no reference exists, designers often wrap the product in paper to estimate the required packaging size. A well-executed dieline is crucial for avoiding costly printing errors.
Does a Dieline Really Matter?
Without a properly structured dieline, packaging can end up with misaligned graphics, improper folds, or sizing issues that render it unusable.
Think of it as a blueprint. It dictates:
- Package dimensions and scale: Ensuring the final product is the right size.
- Visual element placement: Keeping logos, text, and images positioned correctly.
- Structural design: Marking cut lines, creases, glue tabs, folds, and connection points.
- Production notes: Indicating bleed areas, safe zones, and other print specifications.
Dielines serve as the first quality checkpoint in the packaging design process. Designers rely on them to identify and correct errors related to structure, typography, and dimensions before finalizing the design.
Once the dieline is refined, it can be imported into 3D rendering software like Pacdora or Esko Studio Illustrator Plugin to create a digital mockup. This step allows designers to visualize the final structure. A 3D preview also makes it easier to communicate the design to stakeholders.
Before moving into mass production, it’s best to request a physical prototype based on the dieline. This allows for a final check of the structure, ensuring the packaging is both functional and visually appealing. Skipping this step could lead to costly reprints or packaging that doesn’t hold up in real-world use.
Steps To Make a Dieline
Creating a dieline is a precise process that requires a clear understanding of both design and manufacturing requirements.
From measuring the product to testing prototypes, each step plays a crucial role in achieving an accurate dieline.
Requirements
To ensure accuracy and efficiency in the packaging design process, dielines must meet specific technical requirements.
Here are the key essentials:
- Vector-Based Artwork: Dielines must be created as vector files to ensure precision in scaling and cutting. Software like Adobe Illustrator or ArtiosCAD is commonly used for this purpose.
- Exact Specifications: Before incorporating the dieline into an InDesign document or final design, it’s crucial to finalize the exact package dimensions. This prevents costly errors and rework.
- Physical Testing (Optional but Recommended): While not always necessary, printing a hard copy of the dieline can help catch errors before production. Inexperienced designers or those working on complex structures may find this step useful.
- Collaboration is Key: Early collaboration ensures that the dieline meets both functional and aesthetic requirements, reducing the risk of major revisions later.
Procedure
- Find a Reference: If you’re designing packaging similar to an existing product, start by finding a box or package with a similar shape. Carefully unfold and flatten it to analyze its structure and take precise measurements.
- Measure the Product: If no reference packaging is available, wrap the product in paper and mark the necessary folds and cuts. This gives an estimate of the required size and structure.
- Choose Your Design Software: Dielines are typically created in Adobe Illustrator, InDesign, or ArtiosCAD. The choice of software depends on the designer’s preference or the client’s requirements.
- Map Out Cut and Fold Lines: Using vector tools, define the dieline with cut lines, fold lines, glue tabs, and bleeds. Each element must be precisely placed to ensure accurate printing and assembly.
- Test with a Hard Copy: Before finalizing the design, print a prototype on paper or lightweight material to check the fit and structure. Adjustments can be made before moving to production.
How To Read Dielines
While specific colors and labeling may vary by manufacturer or software, the fundamental elements remain the same across the industry.
Here’s a breakdown of key dieline components:
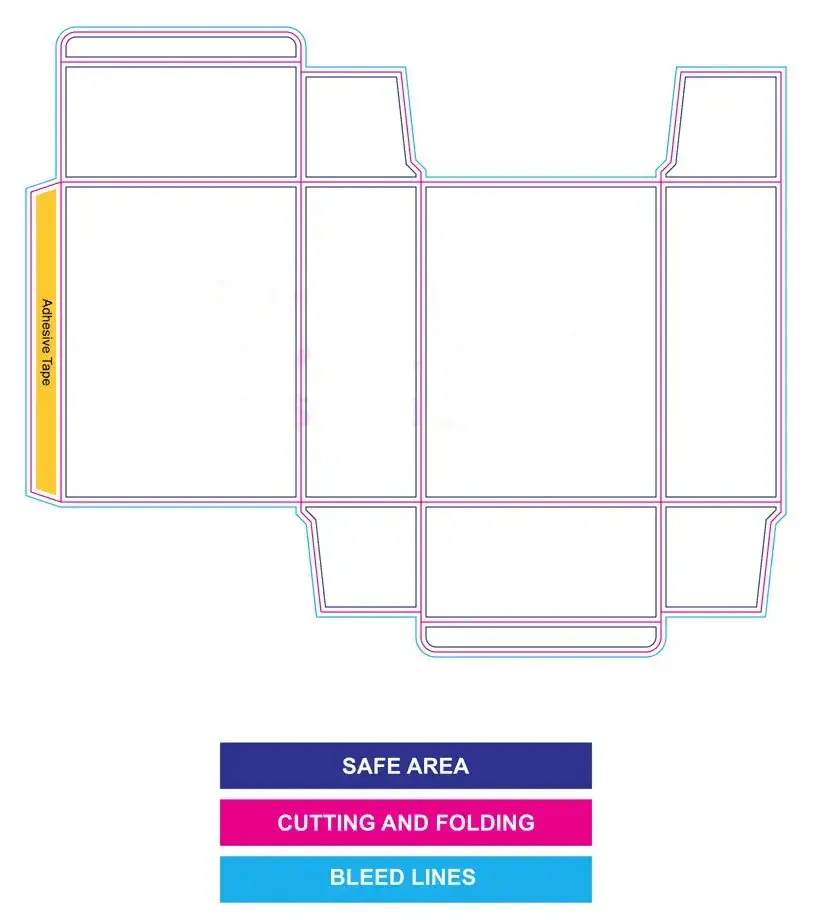
- Cut Lines (Trim Lines): Typically shown as solid black lines, these mark where the die-cutting machine will trim the packaging. This defines the final shape of your design.
- Bleed Lines: Represented by solid green lines, these extend slightly beyond the cut lines (usually by 0.125″ or 3mm) to account for printing shifts. Extending background images and graphics to the bleed line prevents unintentional white borders after trimming.
- Fold Lines (Crease Lines): Solid red lines indicate where the packaging will be folded to form its 3D shape. Properly placed fold lines ensure smooth assembly.
- Safety Lines (Margin Lines): Often shown as dotted green lines, these define the “safe zone” for critical design elements like logos and text. Keeping important details inside this area prevents them from getting too close to the cut line, reducing the risk of accidental trimming.
- Perforation Lines: Displayed as dotted or dashed black lines, these indicate areas that should be punched to create easy-to-tear sections, commonly used for tear-open boxes or perforated tabs.
- Glue Tabs (Seal Tabs): Usually marked with green crosshatch patterns, these show where adhesive will be applied to hold the package together.
In a Nutshell
A well-structured dieline not only enhances the visual appeal of the final product but also prevents costly production errors. By following best practices and collaborating with your team, you can create packaging that is both functional and visually compelling.
FAQs
What is a Printer Dieline?
A printer dieline is a vector-based outline that serves as a guide for cutting, folding, and assembling printed packaging. It includes markings such as cut lines, fold lines, bleed areas, and glue tabs to ensure accurate production and alignment of design elements.
Is There a Difference Between a Template and a Dieline?
Yes. A dieline is a technical drawing that specifies the exact structure of a package, including cut and fold lines. A template, on the other hand, is a broader design framework that may include placeholders for artwork but doesn’t necessarily define the structural components needed for manufacturing.

Jennifer James
My specialty is developing cost-effective, attractive, and appropriate packaging for protecting products. I am working with the company to design custom packaging that meets the client’s requirements.